- All
- Product Name
- Product Keyword
- Product Model
- Product Summary
- Product Description
- Multi Field Search

Views: 0 Author: Site Editor Publish Time: 2026-08-03 Origin: Site

Tool failure during precision machining carries a massive penalty. A broken cutter or poor surface finish on a complex, high-value component leads to severe scrap costs and missed delivery schedules. Scaling down tooling introduces immense physical limitations that operators must respect. As tool diameter decreases, core strength drops exponentially. Tool deflection, chip packing, and premature breakage become constant threats to production stability. You cannot simply apply standard macro-machining principles to miniature tools and expect success. Choosing the right cutter requires a systematic, engineering-led framework. We evaluate material science, tool geometry, feature size, and application-specific constraints to keep spindles running and parts in tolerance. This guide breaks down exactly how to select the optimal tool for your precision applications, ensuring you maximize tool life and maintain strict dimensional accuracy across every setup.
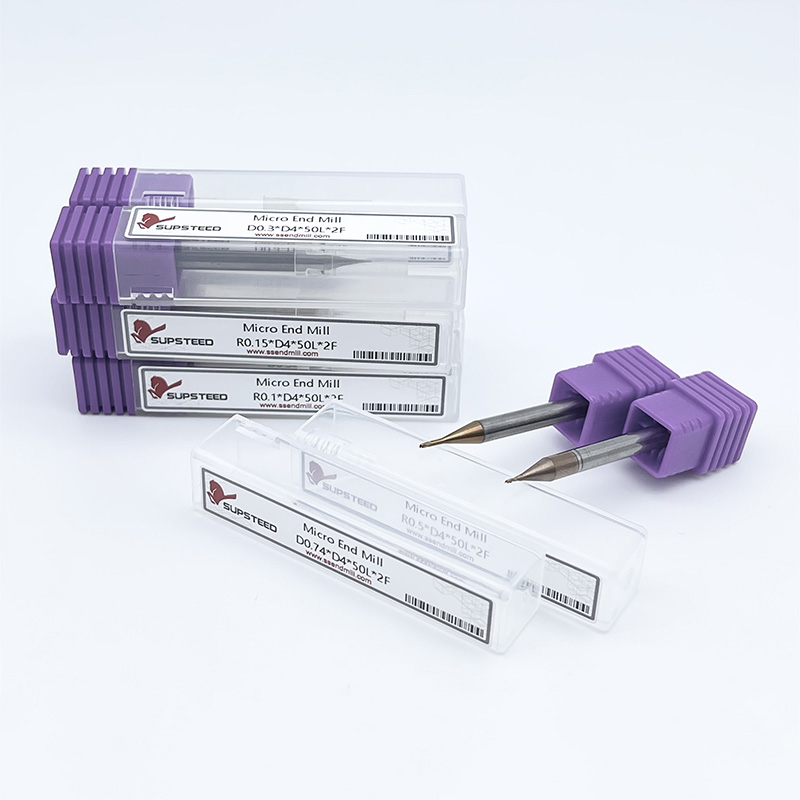
Machinists generally define small diameter end mills as cutting tools with a diameter under 1/8 inch or 3mm. The category of micro end mills typically refers to tools smaller than 0.015 inches or 0.4mm. Physics change drastically at this scale. Surface area to volume ratios shift entirely. Heat dissipation becomes significantly harder because the tool lacks the mass to absorb thermal energy. A standard half-inch end mill can absorb and dissipate substantial heat during a heavy cut. A miniature tool cannot. The cutting edge absorbs heat instantly, leading to rapid thermal expansion and potential edge degradation. You must adjust your entire machining approach, from toolpath generation to coolant application, to accommodate these physical limitations.
You must match the tool diameter to the smallest internal corner radius of the workpiece feature. Using a tool with the exact same radius as the corner causes severe tool engagement spikes. When the cutter enters the corner, the radial engagement jumps rapidly. The cutter suddenly engages a massive amount of material, which spikes the cutting forces and snaps the tool instantly. Always select a tool diameter slightly smaller than the corner radius. For example, if the print calls for a 0.062-inch internal radius, do not use a 0.125-inch end mill. Use a 0.093-inch or 0.100-inch tool. This allows the CNC machine to interpolate the corner smoothly, keeping the tool engagement angle consistent and preventing breakage.
Proper staging is mandatory on the shop floor. Use the largest possible diameter for bulk material removal. Do not use miniature tools for heavy roughing operations just to save a tool change. Reserve them strictly for detailed feature work, rest-machining, and finishing passes. This strategy minimizes tool stress, extends tool life, and maintains dimensional accuracy on the final part.
Tool deflection is a mathematical reality that dictates your success or failure. Deflection increases by the cube of the tool length and decreases by the fourth power of the tool diameter. A slight increase in length causes a massive loss in rigidity. Halving the diameter of a tool actually increases its deflection by a factor of sixteen under the same cutting forces. You cannot ignore this math.
You must select the shortest possible Length-of-Cut (LOC) to maintain rigidity. Success depends on minimizing the LOC ratio. A 3:1 ratio (length to diameter) is standard and safe for most operations. Pushing to a 5:1 or 10:1 ratio requires extreme caution. You must reduce feed rates heavily and take very light radial step-overs. You must also consider relieved neck designs to avoid shank rubbing while keeping the actual cutting flutes as short as possible.
Achieving recommended Surface Feet per Minute (SFM) is a major challenge in micro-machining. Small diameters require extremely high-speed spindles to generate the necessary surface speed. You often need 30,000 to 80,000 RPM or more to hit the correct SFM for materials like aluminum or brass. Standard CNC machines often max out at 10,000 or 12,000 RPM. This creates a severe surface footage deficit.
Running below optimal SFM causes rubbing instead of shearing. The tool pushes the material rather than cutting a clean chip. This leads to work hardening of the workpiece, especially in stainless steels and titanium. It also causes rapid tool wear and premature failure. If your machine lacks the necessary RPM, you must compensate. You will need to lower your feed rate proportionally to maintain an acceptable chip load per tooth, but you must ensure you do not drop the feed so low that the tool stops cutting and only rubs.
Standard macro-tooling substrates fail completely at the micro scale. High-Speed Steel (HSS), Cobalt, and Powdered Metal lack the necessary stiffness and transverse rupture strength. Ultra-fine grain solid carbide is mandatory. The inherent stiffness of carbide resists deflection under cutting forces better than any other standard material. Micro-grain carbide provides a dense, uniform structure with grain sizes often below 0.5 microns. This allows tool manufacturers to grind extremely sharp, precise cutting edges without the material crumbling or flaking away. You cannot compromise on substrate quality when working with miniature tools; cheap carbide will chip immediately upon entering the cut.
The tip profile dictates the tool's application, surface finish capabilities, and overall durability. Flat or square end mills create flat-bottomed pockets and generate sharp 90-degree corners. However, the sharp corners of a square end mill are highly fragile. They are prone to micro-chipping under stress, especially in hard materials.
Ball nose end mills excel at 3D contouring. They are ideal for complex surfacing, mold making, and 5-axis simultaneous machining. The continuous radius distributes cutting forces evenly across the tip, making them quite robust, though they suffer from zero surface speed at the dead center of the tool.
Bull nose end mills feature a specific corner radius. This geometry is a critical advantage in micro-machining. The radius reinforces the cutting corner, drastically extending tool life compared to a sharp square profile. The radius distributes the heat and cutting force over a larger area. Whenever the engineering print allows for a small internal radius at the floor of a pocket, use a bull nose profile to maximize durability.
Tip Profile Application Guide
| Tip Profile | Primary Application | Durability Rating | Common Failure Mode |
|---|---|---|---|
| Square / Flat | Flat bottom pockets, sharp 90-degree corners | Low | Corner chipping, rapid edge wear |
| Ball Nose | 3D profiling, mold cavities, complex surfacing | High | Center tip rubbing, uneven wear |
| Bull Nose (Corner Radius) | High-feed milling, pocketing with floor radii | Very High | Flute wear, coating degradation |
Flute count directly impacts core web thickness and chip evacuation capacity. A 2-flute design offers deep flute valleys. This maximizes chip evacuation and is ideal for gummy materials like aluminum or plastics where chip packing is a major risk. However, the deep valleys leave a thin core web, reducing overall tool strength and making it highly susceptible to deflection.
A 4-flute or 6-flute design features shallow valleys. Chip evacuation is limited, meaning you cannot take heavy cuts in soft materials without clogging the tool. However, the core web is thick and robust. This provides maximum strength for cutting hardened steels, titanium, and superalloys. You must balance the need for chip clearance against the need for tool rigidity based on your specific workpiece material.
Chatter is a high-frequency vibration that destroys tools, ruins surface finishes, and damages spindle bearings. Variable helix and variable pitch geometries disrupt these harmonic frequencies. The flutes are spaced unevenly, or the helix angle changes along the length of the tool (e.g., alternating between 35 and 38 degrees). This prevents the tool from falling into a resonant vibration pattern during the cut. Mitigating chatter is a critical feature for extending tool life in delicate applications, especially when using tools with longer reach.
Deep cavity reach requires specific neck configurations to avoid catastrophic tool failure. A straight shank design provides maximum rigidity but limits reach. If you try to machine a deep pocket with a straight shank tool, the shank will rub against the walls, causing friction, heat, and immediate breakage.
A relieved neck (or reduced neck) design solves this problem. The diameter of the tool behind the cutting flutes is ground down slightly smaller than the cutting diameter. This allows the tool to reach deep into cavities without rubbing the walls. The transition from the neck to the shank must be a smooth taper to avoid creating a stress riser. The shank itself must remain robust. A standard 1/8 inch or 4mm shank is common, even when the cutting diameter is microscopic. A robust shank ensures a secure interface with the tool holder, minimizing runout and maximizing gripping force.
Machining non-ferrous metals requires specific tool geometries to prevent material adhesion. Aluminum and copper are gummy. They tend to weld to the cutting edge under heat and pressure, creating a built-up edge (BUE). This ruins the surface finish, alters the tool geometry, and eventually breaks the cutter.
Hard metals generate immense cutting forces and extreme heat at the cutting zone. Tool deflection and thermal shock are the primary failure modes. You must prioritize core strength, heat resistance, and edge stability.
Plastics melt easily under friction. Composites like carbon fiber or G10 delaminate and cause rapid abrasive wear on the cutting edge. Heat generation is the absolute enemy when machining these materials.
Coating Selection Matrix
| Coating Type | Primary Application | Key Characteristics |
|---|---|---|
| TiAlN (Titanium Aluminum Nitride) | Ferrous metals, high-heat applications | Forms an aluminum oxide layer under heat, excellent thermal barrier. |
| AlTiN (Aluminum Titanium Nitride) | Hardened steels, dry machining | Higher aluminum content than TiAlN, withstands extreme temperatures. |
| ZrN (Zirconium Nitride) | Non-ferrous metals (Aluminum, Brass) | High lubricity, prevents material adhesion and built-up edge. |
| DLC (Diamond-Like Carbon) | Plastics, composites, aluminum | Extreme hardness, ultra-low friction, very thin application. |
Coatings add physical thickness to the cutting edge. Standard Chemical Vapor Deposition (CVD) or thick Physical Vapor Deposition (PVD) coatings can inadvertently dull a microscopic cutting edge. This edge rounding increases cutting forces significantly. It causes the tool to rub rather than shear the material. In micro-machining, this rubbing leads to immediate failure because the tool lacks the strength to withstand the increased pressure.
You must define the necessity of ultra-thin coatings. Many manufacturers offer specialized micro-coatings applied via advanced PVD processes that maintain edge sharpness while providing thermal protection. In some cases, uncoated, highly polished solid carbide is the superior choice. Uncoated tools provide the absolute sharpest edge possible, which is often required for machining acrylics, polycarbonates, and certain non-ferrous applications where a mirror finish is required.
Standard ER collets are often insufficient for miniature tooling. A standard ER collet might have 0.0005 inches of runout. On a half-inch tool, this is negligible and easily absorbed by the tool's mass. On a 0.010-inch tool, this runout represents 5% of the tool's entire diameter. It causes catastrophic uneven chip loading. One flute takes a massive cut, while the other takes nothing. The tool snaps instantly upon entering the cut.
You must minimize Total Indicator Runout (TIR) at all costs. Evaluate advanced tool holding alternatives. Shrink-fit holders provide excellent concentricity and massive gripping force, though they require a heating unit. Hydraulic chucks offer excellent vibration damping and high precision, making them ideal for micro-milling. High-precision mechanical milling chucks are also viable if maintained properly. Your goal is to achieve runout below 0.0001 inches (2.5 microns) at the tool tip to ensure even chip loads per tooth. You must verify this runout using high-end optical comparators or laser measurement systems, as standard dial indicators cannot accurately measure the flutes of a micro tool.
Chip recutting is a major danger in micro-pockets. If chips remain in the cutting zone, the tool will crush them against the workpiece. This destroys the fragile cutting edge and ruins the surface finish. You must evacuate chips efficiently and continuously.
Flood coolant can sometimes cause thermal shocking in solid carbide, leading to micro-cracks along the cutting edge, especially when machining steels. High-pressure through-spindle coolant is excellent for deep pockets, but miniature tools rarely have through-coolant holes due to their size. Minimum Quantity Lubrication (MQL) or targeted high-pressure air blasts are often the most effective solutions. Air blasts clear chips rapidly without inducing thermal shock. MQL provides necessary lubricity to prevent built-up edge without flooding the work area and hiding the cutting zone from the operator.
Tool selection involves analyzing performance requirements against production realities. You must know when to invest in premium, application-specific tooling. High-volume production runs justify premium tools. Tight-tolerance aerospace or medical parts demand them. Premium tools offer tighter manufacturing tolerances, superior carbide grades, and advanced coatings. They deliver predictable tool life, which is mandatory for unattended machining operations.
General-purpose miniature tools have a place in the shop. They are suitable for prototyping, one-off jobs, or machining low-stress materials like wax or modeling board. However, you must understand the hidden costs of cheap tooling. Cheap tools suffer from inconsistent edge prep, varying core diameters, and higher runout straight from the factory. This leads to increased machine downtime for constant tool changes. It results in higher scrap rates due to broken tools embedded in parts or poor surface finishes. Unpredictable tool life destroys process reliability. In precision machining, the cost of a scrapped part almost always exceeds the cost of a premium cutter.
Successful deployment of miniature cutting tools is an exercise in maximizing rigidity, matching feature geometry, and controlling runout. It is never just about selecting the right diameter. You must account for the exponential loss of core strength and the critical need for efficient chip evacuation to keep your process stable.
Take these actionable next steps to improve your precision machining process:
A: The industry standard typically defines these tools as having a cutting diameter under 1/8 inch or 3mm. They require different machining strategies than standard macro-tooling due to reduced core strength, altered heat dissipation dynamics, and extreme sensitivity to runout.
A: Micro tools represent a sub-category, usually referring to cutters under 0.015 inches or 0.4mm in diameter. Operating these tools often requires specialized microscopic inspection equipment, ultra-high RPM spindles, and extreme environmental temperature control to maintain tolerances.
A: While possible on miniature parts, best practice dictates using the largest possible tool for roughing. This removes chip volume quickly and safely. Reserve miniature tools strictly for finishing passes, rest-machining, and cutting tight internal radii to prevent breakage.
A: Prevention requires minimizing runout below 0.0001 inches, optimizing chip load, and using the shortest possible Length-of-Cut. Selecting a corner radius profile instead of a sharp square edge adds significant strength. Ensuring proper chip evacuation via air blasts prevents recutting.
A: Flute count depends entirely on the material. Use 2 or 3 flutes for aluminum and plastics to maximize chip clearance and prevent packing. Use 4 or more flutes for steels and hard alloys to maintain maximum core strength and rigidity.
A: A standard 3:1 ratio (length to diameter) is highly recommended for stability. Pushing to a 5:1 or 10:1 ratio introduces exponential risks of deflection and breakage. If deep reach is required, utilize a relieved neck design rather than a long cutting flute.
A: Yes. A 0.0005-inch runout on a half-inch tool is negligible. On a 0.010-inch tool, that same runout causes catastrophic uneven chip loading. One flute takes the entire cut, leading to immediate tool failure. Precision tool holding is absolutely mandatory.