- All
- Product Name
- Product Keyword
- Product Model
- Product Summary
- Product Description
- Multi Field Search

Views: 0 Author: Site Editor Publish Time: 2026-08-23 Origin: Site
Machining aluminum throws a specific set of metallurgical hurdles at your spindle. Its gummy consistency, low melting point, and aggressive tendency to weld to cutting edges make chip evacuation your primary bottleneck. If you get the flute count wrong, you choke your Material Removal Rate (MRR). You also invite catastrophic tool failure from chip packing and inflate cycle times. Relying on old shop floor habits—like throwing a 2-flute at every soft metal job—bleeds profitability.
While 2-flute tools were the default for decades, modern CNC rigidity and advanced toolpath generation have completely shifted the baseline. This guide breaks down the mechanical trade-offs between 2, 3, and 4-flute geometries. We will look at exactly when to deploy specific end mills to maximize efficiency, eliminate chatter, and keep your spindles turning profitably in aluminum applications.
Success on the shop floor comes down to maximizing MRR, holding tight tolerances, and keeping tools intact. Achieving all three requires a deep understanding of cutting physics. Flute count dictates the physical geometry of the tool, which directly controls how metal shears and evacuates.
End mill design forces a strict compromise between core diameter and gullet size. The gullet is the empty valley between the cutting edges. This void gives chips room to curl, break, and ride up the helix out of the hole. When you add flutes to a tool, you shrink the gullet. Less open space means chips struggle to escape.
However, adding flutes increases the solid carbide core diameter. A thicker core drastically improves rigidity. Rigidity fights the lateral cutting forces that push the tool away from the workpiece. Less deflection means straighter walls and better surface finishes. You have to balance the physical strength of the carbide against the volumetric space needed to move aluminum out of the cut.
Aluminum transfers heat well, but it melts at a relatively low temperature. The shearing action of milling generates intense friction. If your gullets are too small, chips get trapped in the cutting zone. The tool then strikes those same chips again. This re-cutting generates a massive thermal spike.
The aluminum quickly reaches a plastic state and friction-welds directly to the carbide face. Machinists call this Built-Up Edge (BUE) or galling. Once BUE forms, your sharp cutting edge is gone. The tool stops shearing and starts plowing raw material. Spindle load spikes instantly. If you do not hit the emergency stop, the end mill will snap.
For a long time, the 2-flute end mill was the only tool anyone used for aluminum. Its design prioritizes empty space over solid mass. This makes it a highly specialized cutter for specific, heavy-chip operations.
The biggest advantage of a 2-flute design is massive chip clearance. Each gullet takes up nearly half the tool's circumference. This geometry excels when you plunge directly into raw stock. It handles heavy slotting operations at 1D to 2D axial depths without breaking a sweat. When you need to evacuate chips from deep, confined pockets, the 2-flute prevents packing better than anything else.
These tools also shine on older equipment. If you run a 40-taper machine from the 1990s with a 7,500 RPM spindle, you cannot utilize high feed rates anyway. Less rigid setups benefit from the lower cutting forces generated by having only two teeth in the material. If your machine lacks high-pressure through-spindle coolant, the massive gullets make up for poor chip flushing.
Programming feeds and speeds takes experience. A 2-flute end mill gives novice operators a wide margin for error. If a programmer feeds the tool too slowly, it just rubs the aluminum. If they push it too hard, the giant gullets usually manage to clear the excess material before it packs up. This simple evacuation dynamic covers up a lot of suboptimal CAM programming.
The main drawback is a hard ceiling on your feed rates. Feed rate equals chip load multiplied by spindle RPM multiplied by the number of flutes. With only two cutting edges, your maximum feed rate is mathematically handicapped. You leave money on the table because the machine cannot move faster.
The thin core also creates mechanical weakness. During heavy radial cuts, the tool acts like a diving board. It bends under pressure. This deflection causes tapered walls. It also induces harmonic chatter, which destroys your surface finish and chips the carbide edge.
Modern CAM software and rigid CNC centers allow for aggressive, high-speed cutting strategies. The 3-flute geometry perfectly matches these modern capabilities, offering a massive upgrade in productivity.
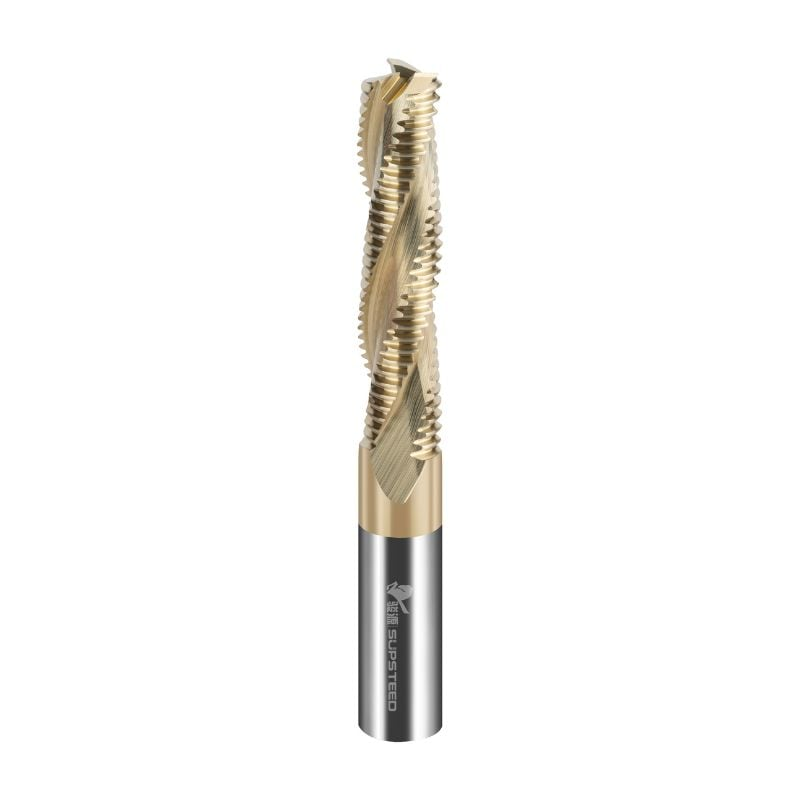
A 3-flute design hits the geometric sweet spot. It increases the core diameter significantly compared to a 2-flute tool. This extra carbide provides the stiffness needed to fight deflection. At the same time, it leaves enough gullet space to clear soft aluminum chips effectively. You get the strength required to push high feeds without the immediate danger of clogging the tool.
An odd number of flutes also provides a massive harmonic advantage. With a 2-flute or 4-flute tool, the cutting edges hit the material symmetrically. This symmetry amplifies vibration, causing chatter. A 3-flute tool breaks up those harmonic frequencies. The asymmetrical engagement stabilizes the cut, allowing the tool to run quietly even at high speeds.
When you run the numbers, the advantage of 3 flute carbide end mills becomes obvious. Assuming you maintain the same spindle RPM and the same chip load per tooth, a 3-flute tool lets you increase your feed rate by 50%. If your old 2-flute program ran at 100 inches per minute, the 3-flute runs at 150 inches per minute. That drops cycle times dramatically.
Surface finish improves just as much. The thicker core stops the tool from bending away from the wall during finish passes. Having three cutting edges means the tool contacts the metal more frequently per revolution. This tighter spacing of scallop heights leaves a mirror-like finish on the final part.
This geometry dominates general aluminum work. It is the absolute best choice for High-Efficiency Milling (HEM) and dynamic roughing. These modern toolpaths use deep axial cuts with very light radial step-overs. The 3-flute tool handles the extreme feed rates required for these paths without deflecting.
It also works perfectly for peripheral milling and outside profiling. As long as you control your radial engagement, the tool will evacuate chips efficiently while holding tight dimensional tolerances.
Adding a fourth flute brings severe diminishing returns in soft metals. While 4-flute tools are the standard for cutting steel, they introduce massive risks when you put them into aluminum.
Soft grades like 6061-T0 or 5052 produce long, stringy chips. These chips need room to curl and snap. A 4-flute end mill has a very thick core and tiny gullets. If you try to rough aluminum with one, those small valleys fill up instantly.
Once the gullet clogs, failure happens in a fraction of a second. The trapped aluminum friction-welds to the tool. The end mill turns into a solid cylinder of aluminum and carbide. It stops cutting and starts pushing the workpiece. Despite having a massive core, the tool will snap violently because the radial pressure spikes beyond the carbide's yield strength.
Many shops try to save money by standardizing their tool crib. They buy 4-flute end mills for A36 steel or 304 stainless, and then run those same tools on aluminum jobs. This is a massive mistake. Steel produces short, brittle chips that clear easily from small gullets. Aluminum chips do not.
Tools used on steel also suffer microscopic edge wear. When you take a slightly dull tool and run it on aluminum, the worn edge generates excess friction. This accelerates BUE formation. You must use dedicated aluminum tooling with sharp, high-rake geometries for reliable production.
Despite the dangers, 4-flute tools have a few specific applications in aluminum.
You cannot select a tool in a vacuum. You have to evaluate your machine's physical capabilities and your shop's programming style before committing to a specific flute count.
To get the most out of a 2 flute vs 3 flute end mill comparison, look at your spindle. Aluminum requires high surface footage (SFM) to shear cleanly. If your spindle maxes out at 4,000 RPM, you cannot push a 3-flute tool fast enough to utilize its potential. In low-RPM situations, a 2-flute tool often performs better because it allows a heavier chip load at a slower feed rate without stalling the spindle.
Machine backlash matters too. If your linear guides or ball screws have play in them, the machine will induce vibration into the cut. A rigid 3-flute tool will transfer that vibration directly into the part, causing chatter. Your workholding and machine kinematics must be tight.
Your CAM software dictates your tooling needs.
Chip evacuation relies on fluid dynamics. You have to evaluate how you get coolant to the cutting zone.
If your machine has weak coolant pumps, you might have to drop back to a 2-flute tool just to survive deep pocketing routines.
Factor in the CAM programming skill of your staff. Dynamic milling requires a solid grasp of radial chip thinning and feed optimization. If your operators are green, the forgiving nature of a 2-flute tool prevents crashed machines. Experienced programmers can unlock the high-performance limits of a 3-flute setup.
Tool Geometry Comparison
| Flute Count | Material Removal Rate | Chip Evacuation Capacity | Core Strength | Primary Use Case |
|---|---|---|---|---|
| 2-Flute | Low to Moderate | Maximum | Low (Prone to deflection) | Deep slotting, beginner setups, low RPM machines |
| 3-Flute | Very High | Moderate to High | High (Resists deflection) | Dynamic milling, high-speed machining, general profiling |
| 4-Flute | Variable (Finish dependent) | Low (Prone to packing) | Maximum | Light finishing, hard alloys (7075), deep wall profiling |
Moving to high-performance tooling requires strict risk management. You have to adjust your machining parameters to match the new geometry, or you will break tools.
Tool overhang, or stick-out, destroys rigidity. You must calculate the absolute minimum stick-out for every setup. The tool should only protrude from the collet far enough to clear the part. Every extra millimeter of stick-out exponentially kills the tool's stiffness.
You also need to watch your Total Indicator Runout (TIR). If a 3-flute tool has 0.002 inches of runout in the holder, one flute takes a massive chip load while the other two just rub the material. This destroys the cutting edge rapidly. Clean your collets and use high-quality tool holders.
When you upgrade from a 2-flute to a 3-flute end mill, do not just blindly increase the feed rate by 50% on the first run. Use a safe scaling framework.
Standard tool coatings will ruin aluminum parts. AlTiN (Aluminum Titanium Nitride) is the standard coating for steel-cutting end mills. It has a high chemical affinity for aluminum. If you run an AlTiN coated tool on aluminum, the workpiece material bonds to the coating instantly, causing massive BUE.
You need coatings engineered for non-ferrous metals. ZrN (Zirconium Nitride) and TiB2 (Titanium Diboride) provide extreme lubricity and stop edge build-up. Highly polished uncoated flutes also work incredibly well. They provide a slick surface that lets chips slide out of the gullet without friction.
Enforce strict rules against sharing tools between ferrous metals and aluminum. Microscopic edge degradation from cutting steel ruins the tool's ability to shear soft aluminum cleanly.
Troubleshooting Common Aluminum Milling Defects
| Defect Observed | Probable Cause | Corrective Action |
|---|---|---|
| Galling / Built-Up Edge | Insufficient coolant or wrong coating | Increase coolant pressure; switch to ZrN or uncoated polished tool. |
| Tapered Vertical Walls | Tool deflection from weak core | Switch from 2-flute to 3-flute; reduce tool stick-out. |
| Harmonic Chatter | Symmetrical flute engagement | Use a 3-flute variable pitch end mill; increase chip load. |
| Catastrophic Tool Breakage | Chip packing in gullets | Reduce flute count for roughing; clear chips with air/coolant blast. |
A: The main difference is the balance between chip clearance and core rigidity. A 2-flute offers massive gullets for maximum chip evacuation but has a weaker core. A 3-flute features slightly smaller gullets but a significantly thicker core. This allows for 50% faster feed rates and drastically reduces tool deflection during high-speed machining operations.
A: Yes, but only for specific operations. You should avoid 4-flute tools for roughing soft aluminum like 6061. The small gullets will pack with chips instantly, causing the tool to snap. They are only viable for extremely light finishing passes or when machining harder, shorter-chipping alloys like 7075-T6.
A: Dynamic milling relies on deep axial cuts and very light radial step-overs. This strategy demands a highly rigid tool to prevent deflection along the extended cutting edge. The thicker core of a 3-flute provides this necessary stiffness. Its three flutes still offer plenty of space to evacuate the thin chips generated by trochoidal paths.
A: No. Steel requires tools with different edge preparations and coatings, such as AlTiN, which are highly detrimental to aluminum. Cutting steel also causes microscopic wear on the cutting edge. Using that worn tool on aluminum generates excess friction, leading to immediate built-up edge (BUE) and catastrophic tool failure.
A: Absolutely. You must avoid AlTiN coatings because aluminum will chemically weld to them. Instead, use coatings like ZrN or TiB2. These offer high lubricity and prevent material adhesion. Highly polished, uncoated carbide is also an excellent choice for keeping gummy chips flowing smoothly out of the cutting zone.
A: Aluminum requires high surface footage to shear cleanly. If your machine has a low maximum RPM, you cannot feed a 3-flute tool fast enough to utilize its full potential. In low-RPM setups, a 2-flute tool often performs better because it handles heavier chip loads at slower feed rates without stalling the spindle.
A: The most common cause is chip packing. When chips cannot evacuate the gullet, they re-cut and generate massive heat. The aluminum melts and friction-welds to the tool, a process called galling. The tool stops cutting and starts pushing material. This causes radial pressure to spike until the carbide physically snaps.