- All
- Product Name
- Product Keyword
- Product Model
- Product Summary
- Product Description
- Multi Field Search

Views: 0 Author: Site Editor Publish Time: 2026-08-23 Origin: Site

Running incorrect tooling on a CNC router destroys profit margins through high scrap rates, machine downtime, and endless manual sanding. Wood is highly anisotropic. You deal with unpredictable grain directions, varying hardness across a single board, and fluctuating moisture content. Standard metal-working end mills fail in this environment. They crush wood fibers instead of shearing them, leaving burned edges and catastrophic tear-out.
To achieve pristine surface finishes and maximize machine uptime, you need a structured evaluation framework. Selecting the right precision cutting tools for wood requires matching the tool's geometry and material to specific wood characteristics, milling operations, and production volume. This guide breaks down the mechanics of CNC wood machining. We will show you how to optimize feeds, speeds, and tool selection to improve part quality and operational efficiency on the shop floor.
Wood density drastically alters cutting resistance and tool wear. Softwoods like pine, cedar, or spruce compress easily under pressure. They require razor-sharp edges to slice the fibers cleanly without leaving a fuzzy, torn surface. If you run a dull bit on pine, the tool simply pushes the fibers over instead of cutting them. Hardwoods like hard maple, white oak, or hickory offer much higher cutting resistance. They generate significant friction and demand robust tool geometries to prevent the cutting edge from deflecting during heavy passes.
Engineered composites, such as MDF, particleboard, and Baltic birch plywood, present a completely different challenge. These materials contain highly abrasive glues and resins. Machining MDF is essentially like cutting through dense cardboard mixed with sand. Standard steel edges dull almost immediately in these composites, requiring specialized carbide or diamond tooling to maintain dimensional accuracy over a production run.
Unpredictable grain patterns further complicate the machining process. Burls, highly figured woods, and intersecting grain directions are prone to catastrophic tear-out if machined improperly. The cutting edge must shear the wood fibers cleanly at a precise angle. If the tool geometry is too blunt or the rake angle is incorrect, the bit acts like a wedge. It splits and crushes the wood ahead of the cut, ruining the surface finish and forcing you to scrap the part.
Thermal dynamics dictate success or failure in CNC wood machining. Unlike aluminum or steel, wood does not conduct heat well. When friction builds up at the cutting edge, the heat stays trapped in the tool and the immediate cutting zone. This thermal build-up leads to burned wood surfaces. Burn marks on cherry or walnut are notoriously difficult to sand out and often ruin the final aesthetic of the piece.
In engineered materials, excessive heat causes even more severe problems. High temperatures melt the resins and binders in plywood or MDF. This melted resin sticks to the tool flutes, creating a hard buildup known as pitch. Once pitch fills the flutes, the bit loses its ability to cut. It begins to rub against the material, generating massive friction that eventually destroys the carbide binder and snaps the tool.
Rapid chip clearance is your primary mechanism for heat dissipation. The wood chips carry the heat away from the cutting zone. Tools designed for wood must prioritize large, polished flute valleys to evacuate material instantly. If chips pack into the cut channel, the bit recuts the same material. You must program your toolpaths to give the chips a clear exit path, especially when cutting deep pockets or narrow slots.
Solid micro-grain tungsten carbide stands as the industry standard for machining natural woods. It offers an excellent balance of edge sharpness and shock resistance. Solid carbide tools maintain their cutting edge significantly longer than high-speed steel (HSS). Manufacturers grind these bits to exceptionally sharp angles necessary for shearing natural wood fibers cleanly without causing fuzz or tear-out.
Coated carbide tools represent a high-performance middle ground. Coatings like Zirconium Nitride (ZrN) or Diamond-Like Carbon (DLC) provide enhanced lubricity and extreme heat resistance. These coatings prevent resin-heavy or sticky woods, such as pitch pine, from adhering to the cutting edge. They allow operators to push higher feed rates and extend the operational life of the bit in demanding production environments without the extreme upfront cost of diamond tooling.
Polycrystalline Diamond (PCD) tooling is the ultimate high-volume industrial solution for abrasive engineered woods. MDF, particleboard, and melamine destroy standard carbide rapidly. PCD tools feature diamond particles sintered together, offering extreme wear resistance. They maintain their dimensional accuracy over massive production runs, cutting thousands of sheets before needing replacement. However, PCD tools have lower shock tolerance. They are brittle and will chip instantly if they strike a hard knot, a hidden nail, or foreign debris in natural wood.
Up-cut bits feature flutes that spiral upward, pulling chips out of the cut channel like an auger. They are the best choice for rapid chip evacuation and deep slotting operations. Because they clear chips so effectively, they run cooler than other geometries. However, this upward lifting action pulls the wood fibers up, often causing severe tear-out and splintering on the top surface of the material.
Down-cut bits push the chips and the material downward. This shearing action leaves a pristine, tear-free finish on the top surface of the workpiece. It also helps hold thin, flexible materials flat against the spoilboard, preventing them from lifting during the cut. The main drawback is poor chip extraction. Because chips are forced down into the cut channel, down-cut bits generate significant heat in deep pockets and require slower feed rates or multiple shallow passes.
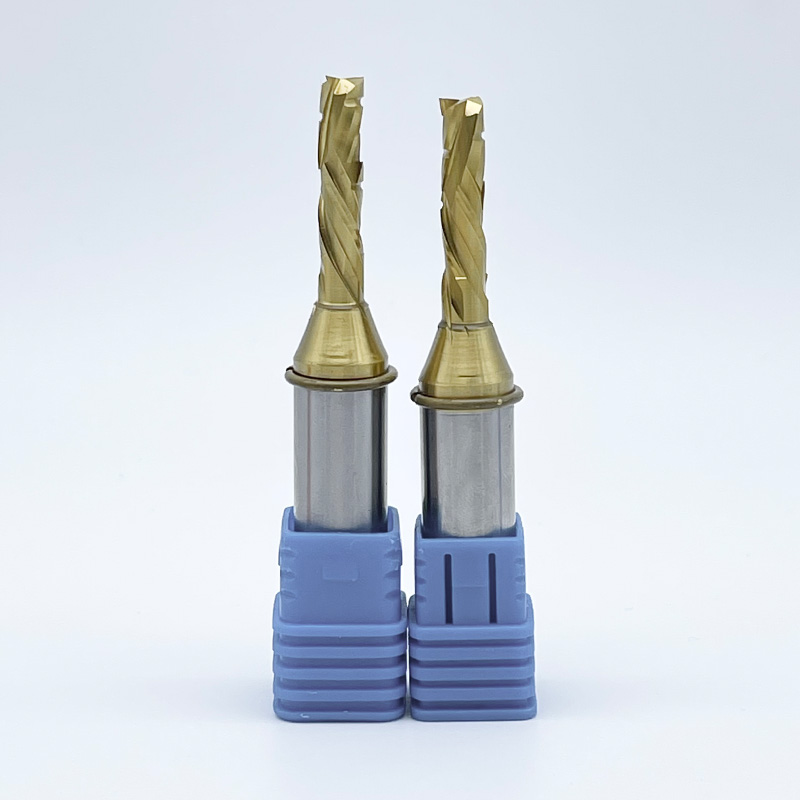
Compression bits combine both geometries into a single tool. The bottom portion of the bit is an up-cut, while the top portion is a down-cut. The opposing shear forces push the chips toward the center of the material core. This leaves both the top and bottom edges of double-sided laminates and plywood completely pristine. Compression bits are the optimal choice for cabinet making, panel processing, and cutting melamine.
V-Bits are essential for fine detailing, chamfering edges, and sign-making. They come in various angles, commonly 60, 90, and 120 degrees, to create sharp, crisp lettering and decorative grooves. The fragile tip of a V-bit requires careful programming. You must avoid plunging too aggressively or running deep passes, as the fine point will snap under heavy lateral loads.
Ball nose bits are mandatory for 3D surfacing and organic contours. Their rounded tips allow for smooth, continuous step-overs when machining complex topographies like topographical maps or custom furniture molds. They leave a scalloped finish that requires minimal sanding when programmed with a tight step-over percentage, usually around 8 to 10 percent of the tool diameter.
Spoilboard surfacing bits play a vital role in maintaining machine calibration. These large-diameter tools face the MDF spoilboard, ensuring it is perfectly perpendicular to the spindle. A perfectly flat spoilboard is the foundation for accurate depth control in all subsequent machining operations. Follow these steps when setting up a spoilboard surfacing operation:
Complex pocketing or 3D profiling requires a two-stage approach: roughing and finishing. Roughing tools, such as chip breakers, are designed for high Material Removal Rates (MRR). They feature serrated edges that break chips into smaller pieces. This reduces the load on the spindle and prevents chip packing in deep cavities. While they clear material rapidly, chip breakers leave a rough, striated surface on the wood.
Finishing tools utilize standard, continuous flutes to shear the remaining material cleanly. Once the roughing pass clears the bulk of the waste, the finishing tool takes a light pass to leave a pristine surface ready for final sanding. Separating these operations extends the life of your finishing tools. You avoid subjecting your sharpest bits to the heavy impact forces of bulk material removal, improving overall part accuracy and edge quality.
Balancing the number of flutes on a router bit dictates the relationship between surface finish and MRR. A 1-flute bit provides massive flute volume for rapid chip clearance. It is ideal for high feed rates in plastics or softwoods where heat evacuation is the priority. However, a single flute leaves a wider cut mark per revolution, resulting in a slightly rougher edge.
A 2-flute or 3-flute bit provides superior surface finishes in hardwoods. More flutes mean more cuts per revolution, resulting in a smoother edge. The trade-off is reduced chip clearance space. To prevent burning with multi-flute bits, operators must increase the feed rate to ensure each flute takes a meaningful bite of material rather than rubbing against the wood. Understanding chip load is the key to balancing these variables.
Baseline Chip Load Guidelines for Wood
| Tool Diameter | Hardwoods (Oak, Maple) | Softwoods (Pine, Cedar) | MDF / Plywood |
|---|---|---|---|
| 1/8 inch | 0.003" - 0.005" | 0.004" - 0.006" | 0.004" - 0.007" |
| 1/4 inch | 0.009" - 0.011" | 0.011" - 0.013" | 0.013" - 0.015" |
| 3/8 inch | 0.015" - 0.018" | 0.017" - 0.020" | 0.020" - 0.023" |
| 1/2 inch | 0.019" - 0.021" | 0.021" - 0.024" | 0.025" - 0.027" |
Tool wear directly impacts dimensional accuracy over long production runs. As a carbide edge dulls, the tool effectively shrinks in diameter. A bit that started at exactly 0.250 inches might wear down to 0.246 inches after cutting fifty sheets of plywood. This wear leads to undersized parts and tight joinery that fails to assemble correctly on the bench. Monitoring tool wear is critical for maintaining tight tolerances in batch manufacturing.
When running continuous shifts on abrasive materials, standard solid carbide bits lose their edge quickly. Upgrading to coated carbide or PCD tooling becomes mathematically viable when the downtime required for frequent tool changes exceeds the initial investment of the premium tool. Every time you stop the machine to change a bit, re-zero the Z-axis, and run a test cut, you lose valuable production time.
For operations requiring exact dimensional consistency over months of production, insert tooling offers a practical solution. Profile bits and spoilboard cutters utilizing replaceable carbide knives allow operators to swap dull edges instantly. You simply unscrew the dull knife, rotate it to a fresh edge, and tighten it back down. This maintains the exact tool diameter without requiring you to update your CAM software.
CNC machining rarely produces a 100% finished part straight off the table. Parts are typically held in place using tabs or onion skins to prevent them from shifting during the final cutout pass. If a part breaks loose while the spindle is moving, it will destroy the workpiece and potentially snap the bit. Efficiently removing these tabs without damaging the workpiece requires integrating manual precision woodworking tools into your post-CNC workflow.
Flush cut pull saws are highly recommended for rapid, damage-free tab removal. Their flexible blades rest flat against the machined edge, severing the tab without digging into the surrounding wood. Do not use a standard chisel to break tabs, as the force often tears the wood grain deep into the finished part.
Following tab removal, specialized sanding profiles, card scrapers, and edge break tools are necessary to prep the raw stock for finishing. A well-equipped post-processing station ensures the precision achieved on the CNC router is not ruined during manual handling. Card scrapers are particularly effective at removing the tiny machining marks left by the router bit without rounding over crisp edges.
Evaluating tooling investments requires looking past the purchase price. PCD tooling carries a massive upfront premium compared to standard solid carbide. However, in high-abrasion applications like cutting melamine or fire-rated MDF, a single PCD bit can outlast fifty carbide bits. You eliminate the labor costs associated with constant tool changes and the material waste caused by running dull bits.
For custom shops cutting a wide variety of natural woods, investing heavily in PCD makes less sense. Natural woods contain hidden hazards like hard knots, mineral streaks, or even embedded nails. Striking a nail with a $30 carbide bit is an annoyance. Striking a nail with a $300 PCD bit is a costly disaster. Match your investment to your primary material stream.
Sending solid carbide bits out for sharpening seems like a smart way to extend tool life, but it introduces logistical challenges. When a sharpening service regrinds the flutes, they remove material. A 0.500-inch bit comes back as a 0.490-inch bit. You must measure every sharpened tool with calipers and update your tool library in your CAM software before running a program. Failing to do so results in oversized pockets and loose joints.
Disposable insert tooling eliminates this dimensional variance. While the initial cutter body is expensive, the replacement carbide knives are cheap. When an edge dulls, you swap the knife in seconds. The tool diameter remains perfectly constant, ensuring your joinery fits perfectly every time without touching your software settings.
Snapped bits are almost always the result of operator error, specifically regarding excessive chip load or inadequate chip evacuation. Chip load is the physical size of the wood chip removed by each cutting edge during a single revolution. If the feed rate is too high relative to the spindle speed, the tool takes too large of a bite. The lateral force exceeds the tool's shear strength, causing it to snap instantly.
Conversely, if the feed rate is too slow, the tool rubs against the wood. This generates extreme heat that degrades the carbide binder until the bit fails. Calculating the proper chip load based on tool diameter and wood hardness is essential. The formula is simple: Chip Load = Feed Rate / (RPM x Number of Flutes).
Fragile tools, particularly the fine tips of V-bits and small diameter end mills, require strict enforcement of shallow passes. Machining too much material at once with a delicate tip guarantees breakage. Always reduce your step-down depth when working with bits under 1/4-inch in diameter.
Tear-out occurs when the cutting force lifts and breaks the wood fibers instead of slicing them. Utilizing ramp-ins instead of plunging straight down into the material significantly reduces stress on the tool and the wood surface. Ramping enters the cut at a shallow angle, easing the tool into the material and preventing the violent impact of a vertical plunge.
Choosing between conventional and climb milling also dictates edge quality. Climb milling pushes the wood fibers down and against the cut, often yielding a cleaner finish on the edge of the part. Conventional milling lifts the fibers, which can cause splintering on porous woods like red oak. Test both methods on scrap material to see which yields the best finish for your specific wood species.
When using compression bits, you must ensure the first pass cuts deeper than the up-cut portion of the bit. If the up-cut section breaches the top surface of the plywood, it will pull the veneer up and cause massive splintering, completely defeating the purpose of the tool.
Flute Geometry Comparison
| Geometry Type | Primary Advantage | Main Drawback | Best Application |
|---|---|---|---|
| Up-Cut | Maximum chip evacuation | Top surface tear-out | Deep slotting, thick hardwoods |
| Down-Cut | Pristine top surface finish | Poor chip clearance, heat buildup | Shallow pockets, thin materials |
| Compression | Clean top and bottom edges | Requires full depth pass to engage | Plywood, double-sided laminates |
| Chip Breaker | High material removal rate | Leaves a rough surface finish | Aggressive roughing operations |
Aggressive tooling choices, such as large diameter bits and high MRR roughing strategies, require corresponding machine rigidity. Light-duty CNC routers lack the mass to absorb the vibrations generated by heavy cuts. This lack of rigidity leads to chatter. Chatter is a rapid vibration that leaves a wavy finish on the wood and micro-chips the cutting edge of the carbide tool.
To minimize runout and vibration, select the largest shank diameter your spindle can accommodate. A 1/2-inch shank is infinitely more rigid than a 1/4-inch shank and will yield a noticeably smoother cut. Never use a reducer sleeve if you can avoid it, as they introduce additional runout.
Routine collet maintenance is equally critical. Wood dust packs into the relief slits of the collet over time. This dust prevents the collet from gripping the tool evenly, pushing the bit off-center. Clean your collets regularly with a brass brush and replace them every 3 to 6 months in a production environment to maintain tool life and surface finish.
There is no universal best tool for CNC woodworking. Success requires building a strategic library of precision cutting tools tailored to specific operations. You need compression bits for flawless plywood profiles, down-cut bits for clean shallow pockets, and aggressive chip breakers for rapid roughing. Relying on a single geometry for every material guarantees suboptimal results and wasted material. Audit your most common materials and identify your primary bottlenecks to prioritize your next tooling investment.
Take the following actionable steps to optimize your CNC workflow:
A: Up-cut bits pull chips upward, providing excellent evacuation for deep cuts but often causing tear-out on the top surface. Down-cut bits push chips downward, leaving a perfectly clean top edge but trapping heat and chips in deep pockets. Choose up-cut for slotting and down-cut for shallow pockets or thin materials.
A: Upgrade to PCD tooling when machining high volumes of abrasive engineered woods like MDF, particleboard, or melamine. PCD offers extreme wear resistance, maintaining dimensional accuracy significantly longer than carbide. Avoid PCD for natural woods with hard knots, as the diamond edges are brittle and prone to chipping upon impact.
A: V-bits break due to excessive lateral force on their fragile tips. This happens when the depth of cut is too deep or the feed rate is too high. Prevent breakage by programming shallow passes, reducing your step-down depth, and utilizing ramp-in toolpaths to ease the bit into the material gradually.
A: Yes. Using a dedicated roughing tool, like a chip breaker, rapidly removes bulk material without packing chips or overheating. Following up with a standard continuous flute finishing tool for a light final pass ensures a pristine surface finish while extending the lifespan of your finishing bits.
A: Burn marks are caused by friction and poor heat dissipation. Prevent them by increasing your feed rate to ensure the bit cuts rather than rubs. Ensure your chip load is correct, use sharp tools, and select bits with adequate flute volume for rapid chip evacuation away from the cutting zone.
A: A manual flush cut pull saw is the most effective tool for tab removal. Its flexible blade rests flat against the machined edge, slicing through the tab quickly without gouging the surrounding wood. Follow up with a card scraper or a specialized sanding block to smooth the remaining nub.
A: Absolutely. Compression bits feature an up-cut bottom and a down-cut top, pushing shear forces toward the center of the material. This unique geometry prevents tear-out on both the top and bottom faces of double-sided laminates and plywood, eliminating the need for extensive manual sanding and edge repair.