Please Choose Your Language
- All
- Product Name
- Product Keyword
- Product Model
- Product Summary
- Product Description
- Multi Field Search

Views: 0 Author: Site Editor Publish Time: 2026-09-22 Origin: Site

Are scrapped parts hurting your machine shop's profitability? Inaccurate hole placement frequently ruins expensive workpieces. This usually happens near the final stages of a complex machining cycle, turning hours of perfect milling into immediate scrap. Operators often blame the primary drill or machine calibration. However, the root cause actually lies in the initial approach. Implementing the right pre drilling tools solves this exact issue. They establish a flawless, rigid foundation for all subsequent cutting operations.
In this guide, we explore the mechanical advantages of starter tools and how they eliminate tool wandering. By understanding cutting physics and tool geometry from a practical engineering perspective, you will learn to improve machining stability. You will also extend tool life and confidently select the best equipment for demanding manufacturing challenges.
Starter tools function as essential guides that create a rigid, precise indentation. This effectively eliminates wandering during initial material contact.
Matching the point angle of your starter tool to your primary cutting instrument is a strict mechanical requirement. It ensures tool longevity and exact hole placement.
Implementing proper protocols significantly reduces radial deflection, mechanical vibrations, and premature wear on high-end primary equipment.
Sourcing high-quality tools with h6 shank tolerances directly correlates with superior surface finishes and reduced scrap rates.
On the shop floor, achieving exact diametric and positional tolerances requires more than just loading a high-quality primary drill into a collet chuck. The entire process relies heavily on the foundational accuracy established before deep drilling even begins. Understanding the mechanical purpose of these preparatory tools is the critical first step toward optimizing your metalworking operations.
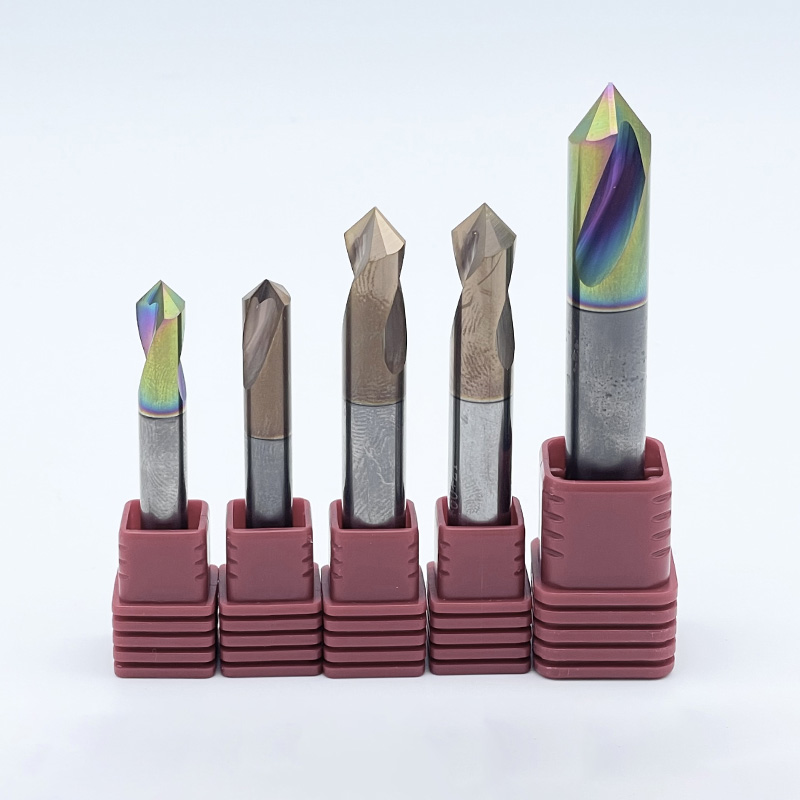
A starter tool is a specialized, highly rigid cutting instrument designed specifically to create a shallow guide hole in a raw workpiece. Standard jobber drills feature longer flutes and thinner webs, making them highly susceptible to bending under heavy thrust loads. In contrast, preparatory tools are engineered for maximum stiffness. They possess a very short flute length and an exceptionally thick core web. This robust structural rigidity ensures the tool does not deviate from its programmed X-Y coordinate upon first contacting the metal. By establishing this true indentation, the tool locks in a perfectly straight path for the subsequent primary drill.
The necessity of this process becomes clear when you look closely at a standard drill tip. The very center, known as the chisel edge, does not actually slice through material. Instead, it extrudes or pushes the metal outward. This extrusion process requires immense axial thrust force. Consequently, the flexible drill tip naturally seeks the path of least resistance, leading to immediate instability and deflection.
Creating a shallow hole beforehand removes the stubborn material at the exact center of the cut. When the primary drill enters this prepared hole, its non-cutting chisel edge encounters empty space. This allows the razor-sharp outer cutting lips to engage the material immediately. This mechanical advantage relieves up to 50 percent of the required thrust pressure. For deep-hole applications utilizing extra-long tools, investing in professional-grade preparatory equipment is a fundamental requirement to prevent catastrophic tool failure.
The ultimate metric of success in any drilling operation is positional accuracy. Starter tools directly address the physical variables that cause a drill to deviate from its intended trajectory. This ensures the final hole meets strict engineering drawing tolerances.
One of the most frustrating challenges for CNC programmers is drilling into non-flat surfaces. Convex cylinder faces or rough, angled castings present major issues. When a standard drill approaches an angled surface, one cutting lip bites into the metal while the other still cuts air. This uneven engagement creates severe asymmetric radial forces. The flexible drill tip will immediately deflect or walk down the incline.
Rigid starter tools completely counteract this phenomenon. Their stubby, robust geometry allows them to bite into curved or angled material cleanly without flexing. By machining a flat, centered reference point into the irregular surface, the tool locks the subsequent primary drill into the exact programmed coordinate. This neutralizes the lateral forces that cause wandering.
Deep hole drilling magnifies any initial positional error. This applies to any hole with a length-to-diameter ratio greater than five to one. If a tool starts off-center by even a fraction of a millimeter, that error compounds as the drill goes deeper. The result is a hole that lacks concentricity, straightness, and ultimately fails quality inspection.
In these demanding applications, the initial hole acts as a physical guide bushing integrated directly into the workpiece itself. By drilling a starter hole that is 1.5 to 3 times the diameter in depth, the cylindrical margins of the primary drill are fully captured. The walls support the tool before the tip begins cutting new material. This mechanical guidance ensures the primary tool remains perfectly straight throughout its entire depth.
Beyond simply hitting the right coordinates, preparatory drilling plays a vital role in the dynamic stability of the CNC machine. Proper tool selection directly influences the mechanical forces at play, protecting the spindle and extending the longevity of the cutting edges.
Tool deflection refers to the physical bending of the drill under the heavy axial load applied by the spindle. High thrust forces naturally induce micro-vibrations and chatter. Experienced machinists can often hear this instability before they see it. It sounds like a high-pitched squeal that degrades the surface finish of the hole walls and causes dimensional inaccuracies.
Because the initial hole removes the material that would otherwise resist the primary drill's chisel edge, the required thrust force drops significantly. Lower thrust force translates to a proportional decrease in tool deflection. With the carbide drill operating in a relaxed, unbent state, harmful vibrations are minimized. This stable cutting environment leads to mirror-like surface finishes, tighter diametric tolerances, and a much quieter machining process.
Premium cutting tools represent significant investments for any manufacturing facility. Solid carbide offers exceptional hardness and heat resistance, but the material is inherently brittle compared to high-speed steel. This brittleness makes the delicate outer cutting corners highly susceptible to micro-chipping upon initial impact with a raw, hardened workpiece.
Proper preparation effectively mitigates this initial impact shock. When a primary tool enters a correctly sized starter hole, the cutting forces are distributed evenly along the cutting lips. The force is no longer concentrated abruptly at the fragile tip. By reducing both the entry shock and the sustained thrust force, starter tools prevent premature edge degradation. This protective measure maximizes the return on investment for expensive tooling and drastically reduces the overall cost per part.
Understanding the variations within the tooling category is essential for making informed purchasing decisions. Different geometries and substrates serve distinct mechanical purposes. Choosing the wrong one can be just as detrimental as not preparing the hole at all.
A common source of confusion among machinists is the distinction between spotting tools and guide tools. While both prepare a hole, their geometries and functions differ significantly.
Feature | Spotting Tools | Guide Tools |
|---|---|---|
Primary Function | Creates a shallow, conical dimple to locate the hole center and leave a chamfer. | Creates a cylindrical starter hole with straight walls to physically guide the primary drill. |
Geometry | Extremely short flutes, often with no margins. Usually available in 90-degree or 120-degree angles. | Short flutes with standard drill margins. Point angles vary to precisely match primary drills. |
Depth of Cut | Very shallow; typically only deep enough to create the dimple. | Usually 1.5 to 3 times the tool diameter to provide physical wall support. |
When selecting the substrate for your tools, the choice generally falls between High-Speed Steel and solid carbide. For modern CNC environments, solid carbide is overwhelmingly the preferred choice.
Carbide boasts a stiffness nearly three times that of High-Speed Steel. This extreme rigidity is exactly what is required to prevent deflection during the critical entry phase. Furthermore, carbide's superior heat resistance allows operators to push higher spindle speeds and feed rates, shaving seconds off cycle times. High-Speed Steel tools are more cost-effective upfront, but their flexibility makes them entirely unsuitable for high-precision or deep-hole applications where absolute rigidity is mandatory.
Certain challenging applications require specialized geometries. Flat bottom drills are utilized when creating a starting point on a severely angled or irregular casting. Instead of a pointed tip, these tools feature a 180-degree flat cutting face. This machines a perfectly flat counterbore into the incline. This flat pad then serves as an ideal, perpendicular entry point for the standard pointed drill, ensuring zero lateral deflection upon entry.
To extract maximum value and reliability from your setup, operators must adhere to strict engineering protocols. Implementing these best practices establishes a foundation for repeatable, lights-out machining.
The absolute most critical rule in precision holemaking is geometry matching. The point angle of the starter tool must always be equal to or slightly wider than the point angle of the primary drill. For instance, if you are using a 135-degree primary drill, your starter must have a 135-degree or 140-degree point angle.
The mechanical reasoning is straightforward. When the primary tool enters the starter hole, it must engage the material at its strong center first. If the starter angle is narrower, the primary drill will contact the conical walls of the hole with its fragile outer cutting corners first. This uneven loading causes immediate chatter and frequently leads to catastrophic chipping of the carbide corners.
Preparatory drilling requires different machining parameters than standard continuous drilling. Because the primary goal is positional accuracy rather than aggressive material removal, spindle speeds and feed rates should be carefully controlled.
As a general rule, starter tools should run at 50 to 80 percent of the feed rate recommended for a standard drill of the same diameter. A slower, controlled entry prevents the highly rigid tool from chipping its own cutting edges upon initial contact with raw material. Once the tool has fully engaged and stabilized within the cut, the feed rate can be normalized for the remainder of the shallow depth.
Effective coolant application is vital during this phase. It is not just for temperature control, but for critical chip evacuation. Whether utilizing through-tool coolant or high-pressure flood coolant, the objective is to flush all metal chips out of the shallow starter hole.
If chips remain trapped, the incoming primary drill will recut those work-hardened fragments. Recutting chips generates severe friction, destroys the cutting edges, and scores the surface finish of the hole walls. You will often smell burning coolant before the tool snaps. Ensure nozzles are precisely aimed and adequate dwell time is programmed to clear the hole before the primary drill descends.
Even with high-end tooling, procedural errors can compromise the entire operation. Avoiding these common empirical mistakes is crucial for maintaining part quality and protecting your machine spindle.
As established, utilizing a spotting tool with a point angle narrower than the primary drill is a fundamental error. Despite this, many shops mistakenly grab standard 90-degree spotters before applying high-performance 140-degree drills. This mismatch forces the primary drill's outer margins to bear the entire initial thrust load. Empirical data shows this practice reduces the lifespan of the primary drill by up to 70 percent due to localized edge fracturing. Always verify point angles before hitting cycle start.
The depth of the starter hole must be carefully calculated. A frequent mistake is drilling too shallow. Creating a dimple that is less than half the drill diameter fails to capture the margins of the primary drill. This offers no physical guidance and renders the process useless against wandering.
Conversely, drilling too deep introduces new problems. Guide tools are designed with short flutes and minimal chip clearance. If pushed beyond three times their diameter, they suffer from chip packing, coolant starvation, and eventual breakage. The optimal depth is typically 1.5 to 3 times the diameter. This is just deep enough to fully engage the primary tool's margins.
Selecting the correct equipment requires a systematic evaluation of your specific machining environment. Purchasing decisions should be based on material science, machine dynamics, and strict manufacturing standards.
The workpiece material dictates the required geometry and coating of your tooling. Analyzing current manufacturing trends, the surge in electric vehicle production and aerospace lightweighting has pushed machine shops to process more high-temperature alloys, titanium, and Inconel. This industry shift demands tooling equipped with ultra-fine 0.4 to 0.6-micron micro-grain carbide substrates.
Additionally, advanced PVD coatings like Aluminum Titanium Nitride are necessary. These specialized coatings maintain edge hardness at temperatures exceeding 800 degrees Celsius. In contrast, softer materials like aluminum benefit from highly polished, uncoated tools that prevent built-up edge adhesion. Evaluate the rigidity of your CNC machine as well. Older machines with spindle wear benefit immensely from robust piloting protocols. The process compensates for the machine's lack of dynamic stability by drastically lowering thrust requirements.
The dimensional accuracy of a starter hole is entirely dependent on the manufacturing quality of the tool itself. Inconsistent web concentricity or asymmetrical cutting lips on a sub-standard drill will create an off-center hole. This defeats the entire purpose of the operation.
Therefore, sourcing from specialized manufacturers who utilize advanced CNC grinding equipment and strict quality control is paramount. When selecting your CNC drilling tools, prioritize suppliers that offer standardized h6 shank tolerances, consistent geometries, and application-specific point angles. Investing in premium tooling upfront drastically reduces the hidden costs associated with scrapped workpieces, machine downtime, and broken primary drills.
Using the right preparatory tools is the definitive first step toward ensuring perfectly accurate holes. By establishing a rigid, centered starting point, you stop drill wandering in its tracks and prevent costly dimensional errors on expensive workpieces. Proper techniques, such as matching point angles and controlling depth, protect your primary cutting tools from premature wear and catastrophic failure. Audit your current machining processes today and eliminate outdated spotting practices. For reliable, high-performance solutions tailored to your specific materials, explore the professional range of pilot drills at ssendmill.com to integrate superior accuracy into your standard operating procedures.
From a strict machining standpoint, the answer is no, but it is highly situational. Many modern, high-performance solid carbide drills feature advanced self-centering point geometries like split points or specialized web thinning. When machining standard depths up to five times the diameter on perfectly flat surfaces, these tools can often initiate the hole accurately without prior spotting.
However, preparation becomes a critical requirement under specific conditions. When executing deep hole operations of eight times the diameter or greater, a starter hole is absolutely essential to act as a guide bushing. Furthermore, if the entry surface is angled, curved, or if the machine setup lacks rigidity, preparation is required to mitigate deflection and vibration.
Using a smaller point angle is one of the most destructive errors in holemaking. If you use a 90-degree tool to prepare a hole for a 135-degree primary drill, the geometry dictates that the fragile outer corners of the primary drill will contact the angled walls of the workpiece first.
These outer corners are designed to shear material at the periphery, not to absorb initial impact forces. The localized stress causes immediate micro-chipping or catastrophic fracturing. The objective rule is that the point angle must be equal to, or slightly wider than, the primary tool. This ensures the strong central chisel edge engages the material first.
Using a standard center drill for CNC milling operations is strongly discouraged. Center drills are specifically designed to create a 60-degree mounting hole for lathe tailstock live centers. Their 60-degree angle severely mismatches the 135-degree or 140-degree angle of modern primary drills. This mismatch will immediately chip the outer corners of your expensive carbide drills. Always use a dedicated tool with a matching point angle.
Because the goal is extreme positional accuracy rather than material removal, you should run the tool slower than your primary drill. A standard industry practice is to reduce the feed rate to 50 to 80 percent of the recommended feed for a standard drill of the same diameter. Spindle speed can remain similar, but the reduced feed ensures a gentle, controlled entry that prevents the rigid tool from chipping its own edges upon impact.
The depth must be carefully controlled to provide adequate guidance without introducing chip evacuation issues. The industry standard dictates that the hole should typically be drilled to a depth of 1.5 to 3 times the diameter of the drill.
The mechanical goal is to drill just deep enough so that the cylindrical margins of the primary drill fully enter the hole before the tip begins cutting new material at the bottom. Drilling deeper offers no additional stability and can trap chips, leading to coolant starvation, heat buildup, and potential tool breakage.